Archive
Customize SharePoint list using InfoPath2010 form Part4
Customize SharePoint list using InfoPath2010 form Part1
Customize SharePoint list using InfoPath2010 form Part2
Customize SharePoint list using InfoPath2010 form Part3
In this post, I’d like to show you how to create print functionality in InfoPath for SharePoint list. The print functionality is provided out of box in InfoPath form library; however it is not available in SharePoint list. Here are the steps to create the print functionality.You can download the new form here.
1. Create print page in the list by first copy and paste the displayifs.aspx and rename the file to Printifs.aspx.

2. Open the page in the SharePoint designer and copy the following javascript to the PlaceHolderTitleAreaClass ContentPlaceHolder.
//You need to refernces jQuery to make the following code work.
//Alternatively , you can only use window.print(); and use css to format the form to print.
<script type="text/javascript">
$(document).ready(function(){

$("[id^='Ribbon']").hide();

$(".s4-title").hide();

$("[id='s4-leftpanel']").hide();

$("[id='s4-ribbonrow']").hide();

$("[id='s4-titlerow']").hide();

$("[id='s4-titlerow']").css("height", "0px");

$("body").css("background-color", "white");

$("body").css("zoom", "135%");

$("[id='MSO_ContentTable']").css("margin-left", "0px");

$("[id='MT-BodyContent']").css("width", "900px");

$(".MT-BodyArea").css("width", "900px");

$("[id='MT-Layout']").css("width", "900px");

$(".ms-bodyareacell").css("width", "900px");

$(".s4-wpTopTable").css("border", "none");

$("[id$='XmlFormView']").css("margin-left", "-80px");

$("body").css("margin-top", "-30px");

$(":contains('ybbest')").css("border", "5px solid #FFCC00");

window.print();

});
</script>
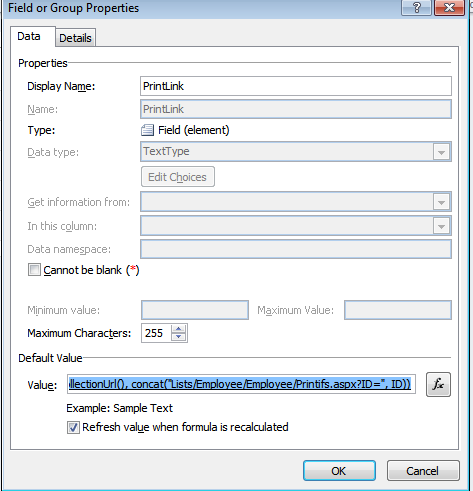
3. Open InfoPath form for the list and create a field called PrintLink

4. Set the default value of printLink that points to the print page I just created before with the query string id.You can download the formula for the default value here.

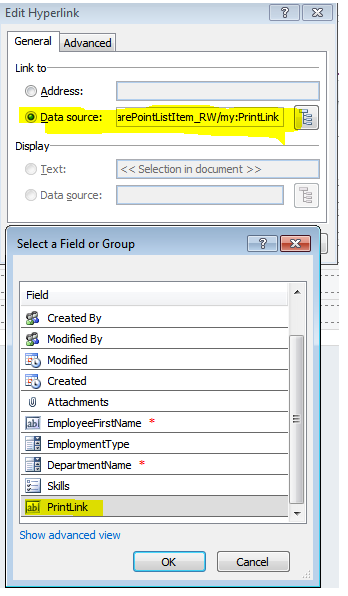
5. Add a new image that looks like Print button on the display view, then I can set the url to the Print link Field. (The reason I did not use button is that you cannot set the navigate url for the button).

6.Set the url of the image to the PrintLInk field.
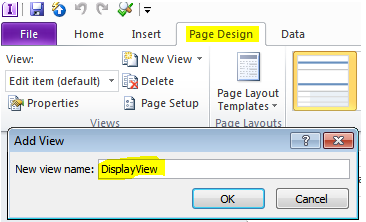
7.Next , create the print view.

8. Copy the contents from the display view to print view

9. Finally, go to the printifs.aspx and edit the InfoPath web part to set the view to PrintView.

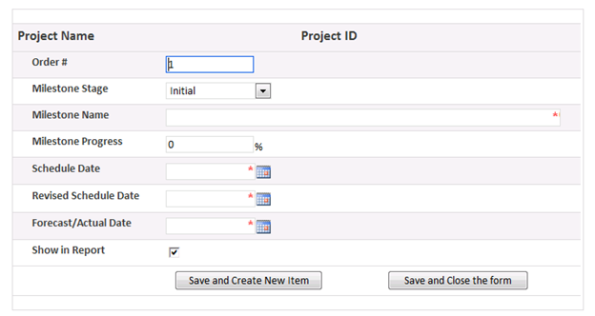
9. Republish you form you will see the form as shown below
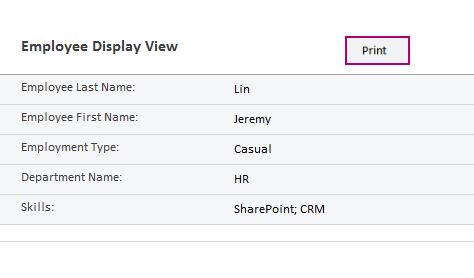
10. If you click the Print button, you will see the print page and print dialog,you can also add the company logo in the print page using css as well.

11.To deploy the customization,you can use the backup and restore content database approach , you can get more details from my previous blog post here.
Customize SharePoint list using InfoPath2010 form Part3
Customize SharePoint list using InfoPath2010 form Part1
Customize SharePoint list using InfoPath2010 form Part2
Customize SharePoint list using InfoPath2010 form Part4
In the part 2 of this series, I have showed you how to create a display view. In this post, I will show you how to create a calculate field for multiple selection box using double eval.
1. I am adding another field in Employee list called skills which allow multiple selections. You can download an updated project here.You can download the formula in a text file here

2. Because Skills field allows multiple selections, you need to use double eval to create the calculate field.Copy eval(eval(Value, ‘concat(., “; “)’), “..”) To the Formula and replace Value with the field value


3. Republish your form and you will see the display form looks like below

4.If you like to remove the trailing ;, you need to change your formula to substring(eval(eval(Value, ‘concat(., “; “)’), “..”), 1, string-length(eval(eval(Value, ‘concat(., “; “)’), “..”)) – 2)

References:
http://www.infopathdev.com/forums/p/17505/60995.aspx
Customize SharePoint list using InfoPath2010 form Part2
Customize SharePoint list using InfoPath2010 form Part1
Customize SharePoint list using InfoPath2010 form Part3
Customize SharePoint list using InfoPath2010 form Part4
In the last post, I have shown you how to customize SharePoint list using InfoPath , in this post I will continue where I left off to show you how to create different views for each form.(edit form and display form)
1. Go to Page Design view and click the New View called DisplayView
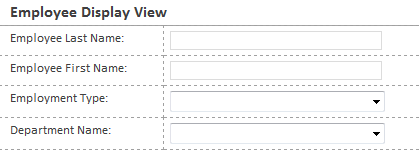
2. Create the form like shown below by first inserting a table and then drag the following fields to the table. However, as you can see that it displays input control like textbox and dropdown list. In the display view, we would like to show only the values of the fields rather than take input from the users. I will clean it up in the following steps.
3. Now, delete the input controls and drag a calculated value control from control sections in the home tab

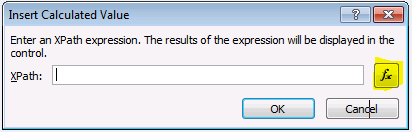
4. Insert the calculated value by selecting the FX
5. Select each field from the fields selection.

6. After you have completed the above steps , you will see the view shown below.

7. Publish the new form and go to the employee list and click the Form Web Parts and select (Employee) Display Form

8. Edit the InfoPath form web part and select the DisplayView

9. Click save and open an item, you will see the display view shown below. However , you will notice that instead of displaying HR for Department Name it displays 2.This is because Department Name is a lookup field , you need to grab the value from the second data source in InfoPath. I will show you the steps next.

10. Right click the calculated field and select the Calculate Value Properties

11.Edit the formula by selecting the fx.

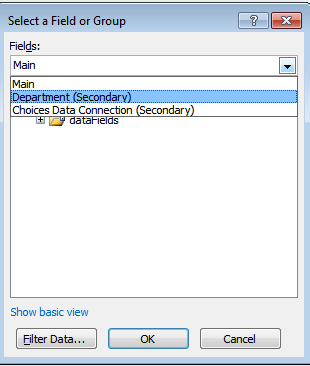
12.Delete the existing formula and click Insert Field or Group

13. Select the Show advanced view and change from Main to Department(Secondary) from the dropdown list.
14 Select the Title from the dataFields and then click Filter Data.

15. Select the Department Name from the Main Data source for the first field.
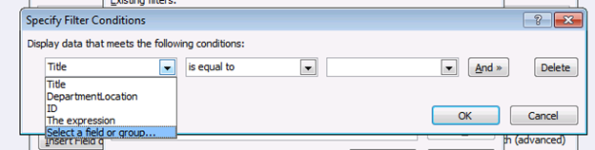

16. Select the ID from the Department(Secondary) data source.

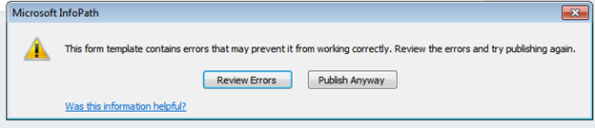
17. Republish your form, you might get the following errors, just ignore it.


18. After the form is published, you can see the correct information on the form shown below

References:
http://ddkonline.blogspot.co.nz/2009/08/infopath-2007-design-checker-error.html
Comparing SharePoint List and Form Library Forms
SharePoint 2010 – Set default value for a lookup column using InfoPath and no code
How to create initiation form for SharePoint2010 workflow part2
In the last post, I have shown you how to create Asp.net initiation form. In this post I will show you how to create the same initiation form using InfoPath. You can download the complete solution here.
1. Create an empty form using InfoPath2010

2. Add the a label, textbox and a button to the form

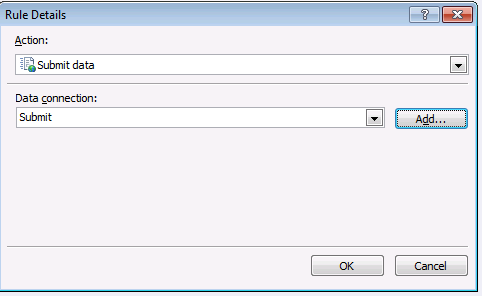
3. Add the following rules to the Start workflow button.
a. Add a Submit data action

b. click the add button and add a new connection
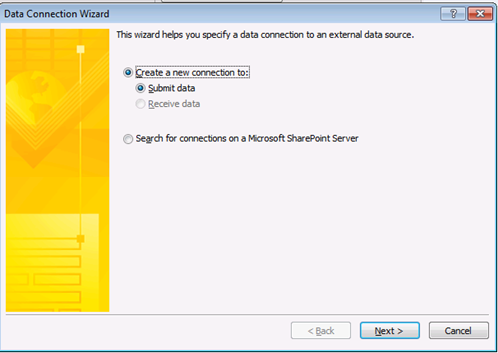
c. Choose the “To the hosting environment, such as an ASP.NET page or a hosting application.
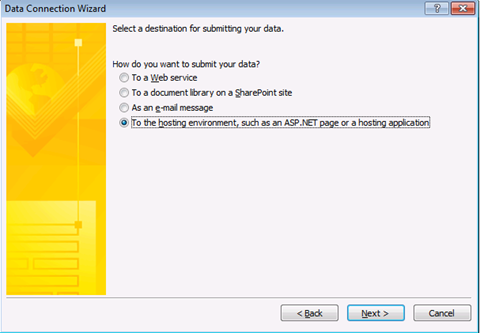
d. Click OK to add the submit data connection.
e. Add the close form action and you are done with the rules.

4. Publish the form to the network and deploy the form to the SharePoint. You can find the details instructions in my previous blog.
5. You need export the InfoPath form and generate the code to get the data from the form.
a.Go to File >> Publish >> Export Source Files

b. Open visual studio Command prompt

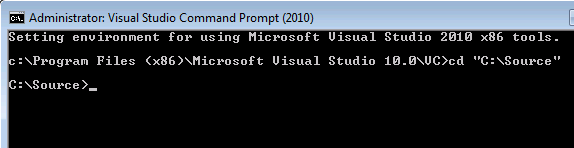
c. Run the following command to generate the code:
xsd mychema.xsd /c /l:cs

6.Add the myfields.cs to the project under workflow node.

7. Modify the elemets.xml file in your custom workflow, as below.

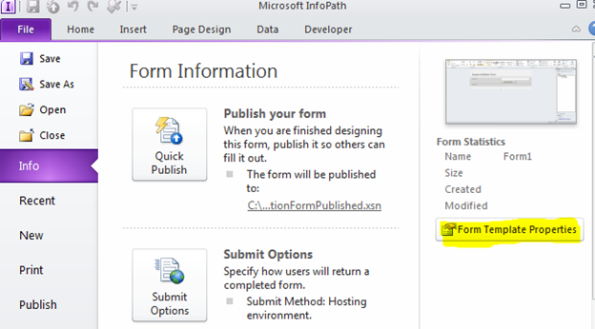
8. You can get the FormURN by going to File >> Form Info >> Form template properties and the ID field is the current form URN.

9. Now, go to your workflow designer and bind your History description to a new property.

10.In the workflow activated event handler , write the following code.

11. Deploy your solution and invoke the workflow and you will see the InfoPath form Initiation Form

Populate people picker with current user in InfoPath2010
In recent project, we have a requirement to populate people picker with current user in InfoPath2010 form. It is quite easy to do it in InfoPath; however it does not quite work as we have expected. In the end, we have to use a combination of InfoPath and list event receiver to complete this task. Here are the steps to set the current user to the additional stakeholder display name in InfoPath.
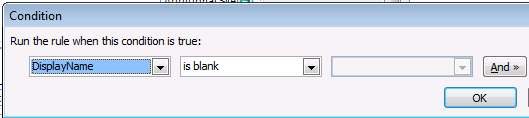
1. Add a set a field’s value rule to InfoPath Form load event.

2. Set the condition as below
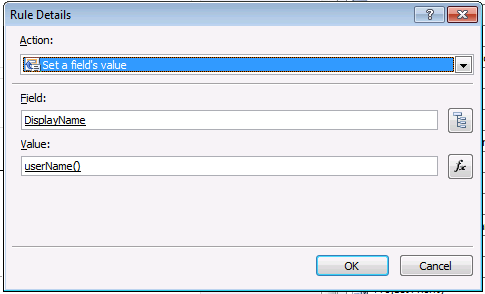
3. Configure the set field value action as below, userName() is a built-in function in InfoPath2010
4. Publish the form, you will see the current user is populated with the current user name as below, however when you click the save, the user does not get saved. I guess this is due to the fact the people-picker control needs to perform a post-back to do some tricks.But we could not force the control to do it in InfoPath2010 for the automatically populated user , therefore we have to write up an list event receiver to set the current user.

5. In you SharePoint solution, add event receiver.
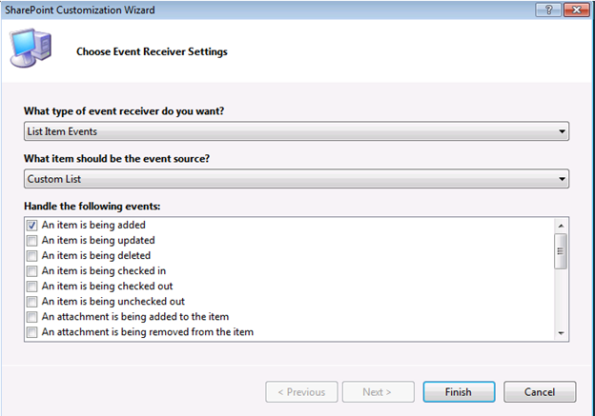
6. Copy the code to as specified to the screenshot
       public override void ItemAdding(SPItemEventProperties properties)
        {
            //base.ItemAdding(properties);

            string keyStakeholders = "Key_x0020_Stakeholders";
                // this has to be the static or internal name , not the display name

            string seperator = ";#";

            SPUser user = properties.Web.CurrentUser;

            if (string.IsNullOrEmpty(SPHelper.SafeToString(properties.AfterProperties[keyStakeholders])))
            {
                properties.AfterProperties[keyStakeholders] = seperator + user.ID + seperator + user.Name;
            }

            else
            {
                SPFieldUserValue fieldValue = SPHelper.GetSPFieldUserValue(SPContext.Current.Web,
                                                                           SPHelper.SafeToString(
                                                                               properties.AfterProperties[
                                                                                   keyStakeholders]));

                properties.AfterProperties[keyStakeholders] = seperator + fieldValue.LookupId + seperator +
                                                              fieldValue.LookupValue + seperator + user.ID + seperator +
                                                              user.Name;
            }
        }
7. Go to the elements.xml under the new event receiver

8. Change the xml highlighted in yellow
From:

TO

9. Deploy your solution; it will work like a charm. 🙂
References:
How to: Create an Event Receiver for a Specific List Instance
Create a “Save and Create New Item” functionality in InfoPath2010 Part2
In the last post, I showed you how to configure the form to enable “Save and Create New Item” using Infopath2010. In this post, I will show you some of the problems and solution with enabling this in the form. Once you have enabled this function in the submit option, the save button in the InfoPath top menu will have the same functionalities, this might be confusing to the user as it will work differently from other forms.
To fix it, you can hide save button at the top ribbon and create a new button on the form called “Save And Close Form”. Here are the steps:
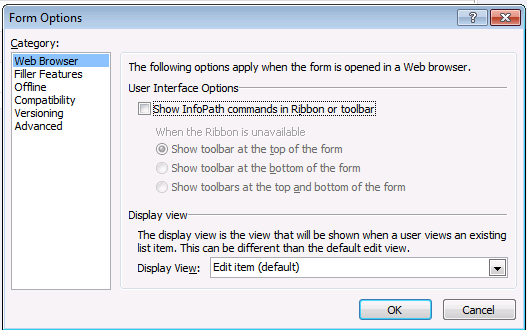
1. Go to File–> Advanced form options –>Web Browser and then untick the “Show InfoPath commands in Ribbon or toolbar”
2. Drag a button and label the button as Save and close the form in the InfoPath form
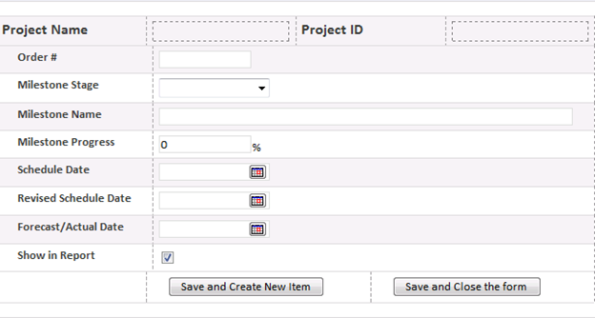

3. Add the following rules to the newly created button. Submit data rule and close form rule.

4. Republish your form and you will see the form as below.
Create a “Save and Create New Item” functionality in InfoPath2010
Recently, I got a requirement to create a button on the InfoPath2010 form that save the current item and then open a new form so that they can add another item. To do so in InfoPath2010 is quite easy, here are the steps:
1. Drop a button at the bottom of the form and label it as save and add another Item
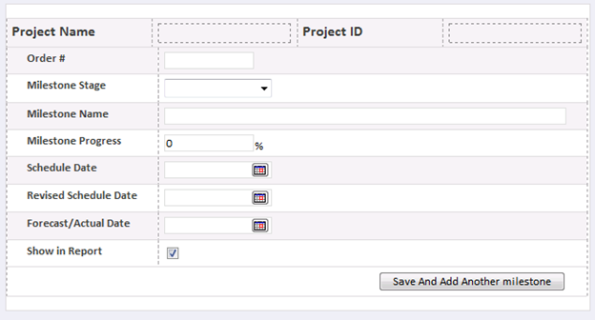
2. Right-click the button and select Button Properties.

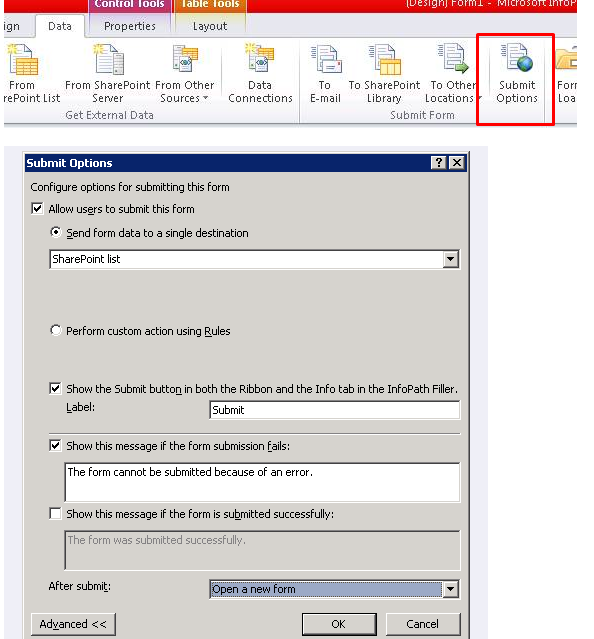
3. Select Submit from the Action dropdown list.

4. Click the Submit Options and click the Advanced button.

5. Select “Open a new form” from the “after submit” dropdown list.
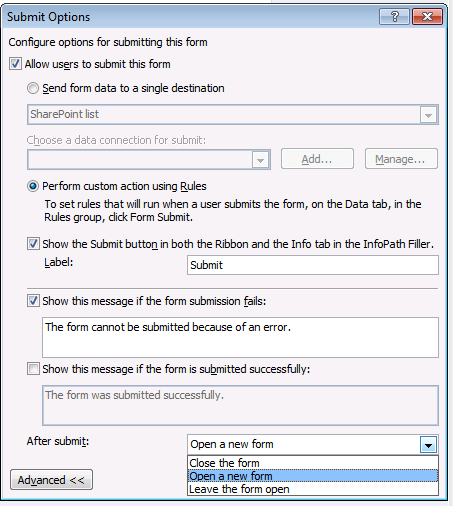
6. Republish your form, it works like a charm. This option is also available from the form submit options for the Save button in the ribbon.
Customize SharePoint list using InfoPath2010 form Part1
Customize SharePoint list using InfoPath2010 form Part2
Customize SharePoint list using InfoPath2010 form Part3
Customize SharePoint list using InfoPath2010 form Part4
In this post I will show you how to customize SharePoint list using InfoPath,you can check the part2 here.
1. Navigate to the SharePoint list and click Customize Form icon.
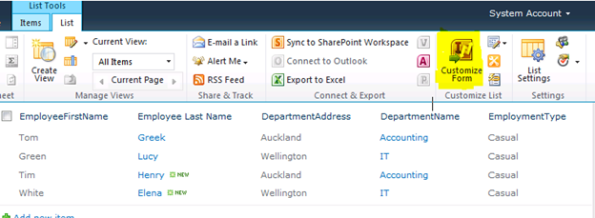
2. This will open the form in InfoPath as below, each field in the content type will be shown on the left panel and form itself will be shown in the design surface.

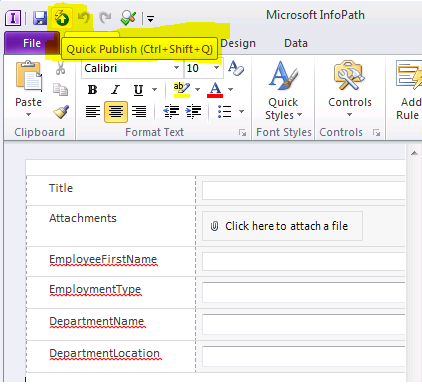
3. After you finish modifying the form (add validation or change the layout), you then can publish the form to replace the existing form in the list. Just click the quick publishing icon on the top left corner.
4 After the form has published successfully, navigate to the SharePoint list and open on existing item you will see the new form in SharePoint list.

5. Also noticed the page that display the form has changed from NewForm.aspx.aspx to newifs.aspx and if you have look at the Form Web Parts options , you will you got 3 new forms ,aka Content Type Forms.

References:
Customizing SharePoint List Forms in InfoPath 2010
Customizing SharePoint List Forms in InfoPath 2010
Deploy InfoPath form as SharePoint feature in SharePoint2010
You can publish your InfoPath form directly to SharePoint2010 using InfoPath2010 publishing feature. However, some of the clients require that all SharePoint deployment has to be done using SharePoint features and solutions. Next, I will show you how to do this:
-
Change the form Security Level to Domain

-
Publish the InfoPath form to a network location

-
Create an Empty SharePoint project as follows(one element and one feature)

-
Change the Deployment Location Path of Elements.xml file to root (i.e. empty location) as highlighted below

-
Change the Deployment Location Path of ContactUS.xsn file to root (i.e. empty location) and change Deployment Type from NoDeployment to ElementFile as highlighted below

-
Add the feature receiver Assembly Microsoft.Office.InfoPath.Server, Version=14.0.0.0, Culture=neutral, PublicKeyToken=71e9bce111e9429c
and add the feature receiver Class Microsoft.Office.InfoPath.Server.Administration.XsnFeatureReceiver to the feature properties as highlighted below.

- (**Update**)
Navigate to the current feature >> Manifest then add the following properties as below(this is not used in this project , but used in deploying Workflow initiation form or association form
- Deploy the solution to a SharePoint site , you will find the InfoPath form under the InfoPath contentType. You can download the sample code here, however you need to open the ContactUsFormUnpublished.xsn using InfoPath Designer and republish the form(Make sure you publish your form to a network location otherwise you might get the The XSN cannot be used on the server.) and replace the current published form in the project with the new one.


Prerequisites to deploy browser-enabled InfoPath forms
- SharePoint Server enterprise edition with InfoPath services enabled
- Enable state services on the web application.
- Activate SharePoint Server Enterprise Site Collection features in the site collection level
- Activate Team Collaboration Lists feature in a site level


